유니티 3D의 좌표계는 총 3가지.
또 모든 오브젝트는 월드 좌표와 로컬 좌표 2가지를 각각 가지고 있다.
기본적으로 월드 좌표는 new Vector3 (100, 10, 100) 처럼
그 월드의 0, 0, 0 좌표를 기준으로 절대적인 위치를 뜻한다.
반면에 로컬 좌표는 부모 좌표를 기준으로 내가 가지고 있는 상대 좌표다.
(하이어라키에 뜨는 좌표는 대체로 로컬좌표다. 아마?)
예) 부모 좌표가 10, 10, 10 / 내 로컬 좌표 0, 10, 0 이라면
내 월드 좌표 : 10, 20, 10
내 로컬 좌표 : 0, 10, 0
이런식으로 변해서 부모 좌표가 이동되면 자식들도 고대로 따라서 이동하는 원리다.
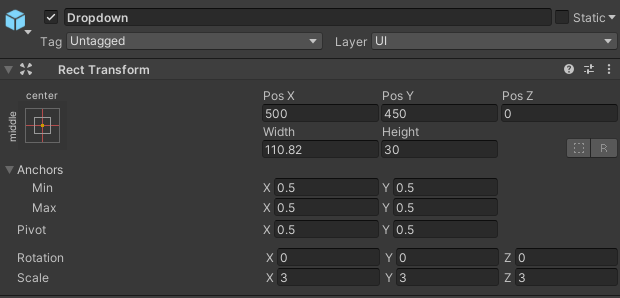
이건 뭐 간단하다... 그런데 UI를 위해 카메라를 기준 좌표가 필요해지면서 복잡해진다.
스크린 좌표(Screen Space)
스크린 좌표는 우선 카메라가 필요하다.
대체로 캔버스의 렌더 모드를 카메라로 바꾸고 카메라 옵젝을 넣어주면 해당 캔버스 자식들은 스크린 좌표로 정리된다.

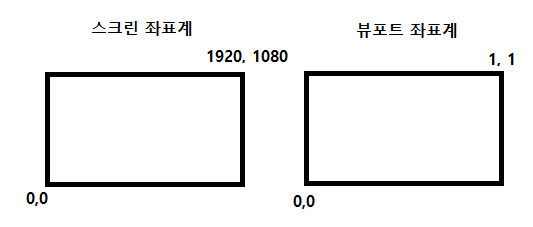
스크린 좌표는 왼쪽 아래를 0, 0 좌표로 하고 양 끝 좌표는 픽셀값이 된다.
예를 들어 1920*1080 카메라가 있으면 왼쪽 아래가 0, 0 오른쪽 가장 위가 1920, 1080 좌표가 된다.
다른 방식으로는 뷰포트 좌표계가 있다.
스크린 좌표계랑 동일한데 단위가 0 ~ 1로 정의된다.
좌표계 변환
각 좌표계를 변환하는 기본 함수.
renderTextureCamera.ScreenToWorldPoint(CurrentPos)
// 카메라.ScreenToWorldPoint(좌표) = 변환된 좌표
이런 식이다. 다른 변환도 이런 식으로 변환됨.
여기서 특징은 월드 좌표 -> 스크린 좌표로 변환했을 때 Vector2가 아니라 Vector3로 나온다는 점인데,
z값에는 카메라와 실제 물체까지의 거리값이 나오는 듯 하다.
(UI에 적용시킬때는 저 멀리 지평선에 그려질 수도 있어서 그냥 z값 제거하고 대입함)
아래는 스크롤, 드래그 등 실제 맵을 비추고 있는 미니맵과 위에 그려지는 UI들 좌표값을 일치시키기 위해 짠 코드중 일부
renderTextureCamera = this.transform.GetComponentInChildren<Camera>();
// 카메라 가져옴
Vector3 CurrentPos = new Vector3(Input.mousePosition.x, Input.mousePosition.y, 0);
//이동 전 마우스 좌표(screen)
Vector3 PreviousPos = renderTextureCamera.ScreenToWorldPoint(CurrentPos);
//이동 전 마우스 좌표(world)
//카메라 사이즈 변경(스크린 상의 좌표 이동됨)
if (Input.mouseScrollDelta.y > 0 && renderTextureCamera.orthographicSize < CameraSizeMax)
{
renderTextureCamera.orthographicSize += ScrollSpeed;
//위로 스크롤(이미지 커짐)
}
else if (Input.mouseScrollDelta.y < 0 && renderTextureCamera.orthographicSize > CameraSizeMin)
{
renderTextureCamera.orthographicSize -= ScrollSpeed;
//아래로 스크롤(이미지 작아짐)
}
CurrentPos = renderTextureCamera.ScreenToWorldPoint(CurrentPos);
//이동 후 마우스 좌표(world)
this.transform.position += new Vector3((PreviousPos.x - CurrentPos.x), 0, (PreviousPos.z - CurrentPos.z));
//이동 후 마우스가 있는 장소의 월드 좌표가 얼마나 이동했는지 계산해서
화면상의 좌표가 동일하도록 카메라 이동
//카메라가 홀 중심으로부터 200좌표 이상 떨어지지 않도록 범위를 제한함
if (this.transform.position.x - HoleCenterPos.x < -300)
{
this.transform.position =
new Vector3(HoleCenterPos.x - 300, this.transform.position.y, this.transform.position.z);
}
else if (this.transform.position.x - HoleCenterPos.x > 300)
{
this.transform.position =
new Vector3(HoleCenterPos.x + 300, this.transform.position.y, this.transform.position.z);
}
if (this.transform.position.z - HoleCenterPos.z < -300)
{
this.transform.position =
new Vector3(this.transform.position.x, this.transform.position.y, HoleCenterPos.z - 300);
}
else if (this.transform.position.z - HoleCenterPos.z > 300)
{
this.transform.position =
new Vector3(this.transform.position.x, this.transform.position.y, HoleCenterPos.z + 300);
}
'📁 개발 히스토리' 카테고리의 다른 글
| 유니티 - 비트 플래그 (0) | 2023.01.06 |
|---|---|
| 유니티 - 배열 혹은 리스트 마지막 번호 <-> 0번 자동화 (0) | 2023.01.03 |
| C++ - 벡터 클래스 구현하기(2) (0) | 2022.11.08 |
| C++ - 벡터 클래스 구현하기(1) (0) | 2022.11.03 |
| 유니티 - 텍스트메쉬프로 사용하기 (0) | 2022.10.19 |